Tile repair: replacing cracked or loose wall/floor tiles
Tile Repair: How to Replace Cracked or Loose Wall and Floor Tiles
Giulia C
Helpi Life contributor
Introduction
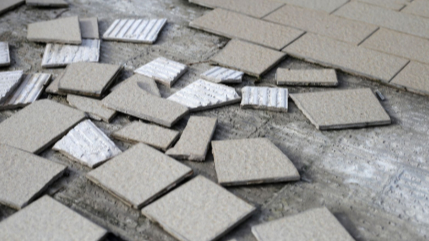
Cracked or loose tiles can really mess up the way your bathroom, kitchen, or hallway looks and feels. If you do not fix them, water can get behind the tiles. Cause even more problems.
The good thing is that you can fix the tiles by yourself if you have the tools and you are willing to take your time.
Here is a simple guide that will show you how to replace cracked or loose tiles on your walls and floors, and it will also tell you when it is better to get a professional to do the job for you, like a tile fixer, for your bathroom tiles, kitchen tiles, or hallway tiles.
Tiles are really strong. They can still break. Some things can make you need to replace tiles.
* Impact from things that you drop on them
* The floor or wall moving
* Using the kind of glue
* Water is getting in and weakening the glue
* The grout is getting old and weak
If you tap on a tile and it sounds hollow, it is probably loose, even if it does not have a crack in it. Tiles that make this sound are likely to be tiles that need to be fixed.
Before you start, make sure you have the following tools and items
* Replacement tile or tiles
* Hammer and chisel or a multi-tool
* Tile adhesive
* Notched trowel
* Grout and a sponge
* Safety glasses and gloves
* Utility knife
* Tile spacers, if you need them
Tip: Try to match the tile type and dimensions to get a replacement. If you do not have a tile, take the broken tile to a tile shop, and they can help you find a replacement tile. You can show them the tile, and they will source a new one for you.
✅ Step 1: Remove the Damaged Tile
Cut the grout around the tile with a utility knife.
This helps to loosen it up.
Be careful when you break up the tile with a hammer and chisel.
Start from the center of the tile. Move outwards.
That way, you avoid making a mess.
Then pry up the tile. Get rid of all the debris.
Make sure to throw it
Don't forget to wear safety goggles.
There will be flying shards of tile. You don't want to hurt your eyes.
✅ Step 2: Clean the Area
Use a chisel or scraper to scrape off the tile adhesive.
It's stuck hard. It will come off.
Make sure the area under the tile is clean and flat.
Also, make sure it's free of dust.
If you're changing a floor tile, check that the subfloor is solid and dry.
That is important.
✅ Step 3: Apply New Adhesive
Apply a layer of tile adhesive with a notched trowel.
Spread it out evenly.
Make sure to put the adhesive on the wall or floor, not on the tile.
That's how it's done.
✅ Step 4: Fit the New Tile
Press the tile into place.
If you need to use tile spacers.
Gently tap the tile into position with a rubber mallet.
This makes sure it bonds with the tile adhesive.
Wipe away any adhesive from the edges carefully.
Don't let it dry there.
Let the adhesive set completely.
This takes at least 24 hours.
The tile adhesive needs 24 hours to set
So just wait.
To start, you need to mix your grout. Then you can apply it with a rubber float.
Press the grout into all the joints, holding the float at a 45° angle.
Next, take a sponge and wipe off any excess grout, moving the sponge diagonally across the tile.
After that, let the grout dry. Then take a cloth and buff the tile to remove any haze from the grout.
There are a lot of tile repair jobs that you can do by yourself. Sometimes it is better to get help from a professional. This is especially true if you are dealing with underfloor heating or areas that are waterproofed.
If the damage is over an area of tiles, you should get a professional to help you. You should also get help if you do not know how to work with kinds of tiles, trims, and fittings. If you think the floor or wall underneath the tiles is not stable and is damp, you should get a professional.
Tile repair jobs can be tricky, especially if you are working with stone or patterned tiles. These types of tiles need to be put in place carefully. A professional will be able to do the job, especially if the area is one that will be used a lot, like tile areas. A professional will do a job, with tile repair especially with tile areas that need special care.
Use good-quality tile adhesive and grout when you are laying tiles.
Tiling needs to be fixed to surfaces at floor level.
You should seal the grout to stop water from getting in and mould growing.
Do not put things on tiles that are on the same floor.
You should clean your tiles with products that will not scratch them.
If you look after your tiles, they will stay nice for a long time, and this means you will not have to pay so much to get them fixed.
Rather leave it to a pro?
Book a verified Pro at a fixed price. Most jobs sorted same day — and you only pay once it's done right.
Final Thoughts
A cracked or loose tile is not good to look at. It can also cause problems like leaks, mould, or even damage to the structure of your house. But do not worry, you can fix the tile by yourself if you have the tools and you are careful with your hands.
Need help? You can use Helpi to find a handyman or a professional tiler whom you can trust to fix or replace the tiles on your wall and floor. They will do the job quickly and do it right. Charge you a fair price.
Download Helpi Life now
If you need help with things around your house, you can get the Helpi Life app from the iOS App Store and Android Play Store now.
Helpi.life/handyman
Dan Quinn
Helpi Verified Pro
Our verified professionals bring years of hands-on experience and industry knowledge to every guide. Each article is reviewed to provide practical, reliable, and easy-to-understand advice for homeowners across the UK.
Published: November 27, 2025
Updated: June 25, 2026
Download the app
Download the Helpi app to manage and monitor your order, chat with your tradesperson, and enjoy exclusive member promotions.

